So you want to make a platforming game using Game Maker Lite, huh? Well, you have come to the right place as this is a in depth tutorial on making a Platforming engine, and then expanding upon it, all with GameMaker Lite.
Warning : Some Coding required.
If you want to make a Platforming game without Coding in the GML Language then stay tuned for my Beginners Tutorial for GameMaker.
First of all we need to have a basic idea of what we want our game to be like when it is finished. For simplicity’s sake I will be making a clone of the popular DOS game “Dave” albeit with different sounds, graphics and animations.
To finish and understand this tutorial you will need a basic understanding of scripting and of course the GameMaker Lite software. If you don’t have the GameMaker Lite software you can refer to my tutorial on downloading and installing it.
First of all we will make a new GameMaker File.
To do this we Click on File > New.
Once we have done this we can start importing our sprites.Sprites are the basic pictures and animations our game will have. If we want to add a new image for our character we do it here, if we want our enemy to have a different image we do it here.
For simplicity’s sake I will only be using Sprites and sounds available with the download of GameMaker.
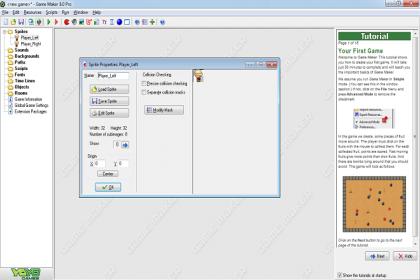
We start by importing one sprite each for the Left and right walking animations of our Character (ie. The main protagonist of out game).Name them Player_Left and Player_Right.
Note: Make sure the “Precise Collision Checking” box has been unchecked.

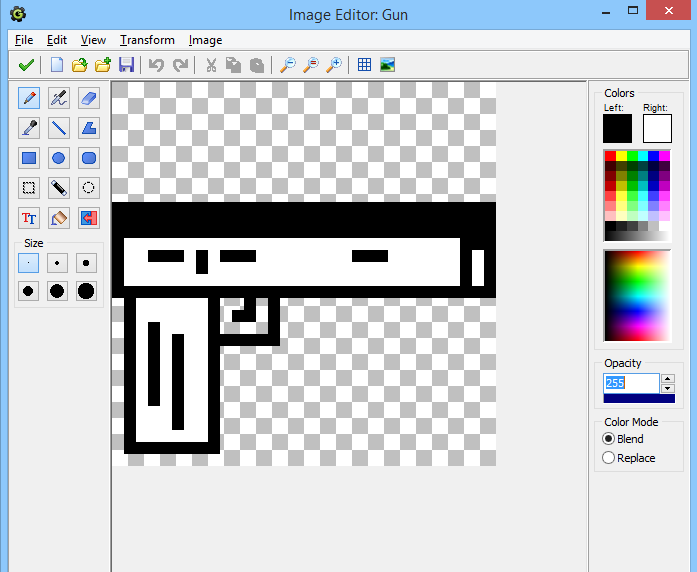
After making the sprites for our character we can start making a sprite for the platforms and walls our Character will stand on. Make a 16×16 pixel big sprite and call it Block.
This will be the boundary which will stop our character from falling off the level and also provide a platform for him to jump on.
These are the Basic Sprites we will need for our Platforming Engine. Expanding upon this by adding AI Enemies, Points system, Power ups and Multiple Levels will be the subject of future Tutorials.
Now that we have our sprites made we can start making our Objects. First we will be making our Player.
Click on “Create an Object”, name it “Player” and give it the Sprite “Player_Right”.
Now in the Events tab of your newly created “Player” object click on “Add Event” and click on “Create”. Now we can specify what we want to do as soon as our “Player” Object is created.
We will only be declaring the variables required for our basic movement in the “Create” event so in the “Control” tab to the right, Drag and Drop the “Execute Code” action to the Actions Box.
A new Text Box labelled “Execute Code” in it Paste this Code:
grav = 0;
vspd = 0;
hspd = 0;
dir = 0;
Now click on New Event>Step>Step
This will create a Step Event which will be executed in an unending loop.
Create another “Execute Code” Action inside the Step Event and Paste this Code in it.
if !place_meeting(x,y+1,Block) // if we are in the air
{
grav = .5; // set the gravity to .5
vspd += grav; // add .5 to our vspd once every step
}
else // else if we are on the ground
{
grav = 0; // set the gravity to 0
vspd = 0; // set vspd to 0 to stop moving
if keyboard_check_pressed(vk_up) // since we are on the ground, we can jump here, so check if we pressed up
{
vspd = -8; // set the vspd to -8, which will make us jump
}
}
if keyboard_check_released(vk_up) // if we released the up button while in the in air
{
vspd *= .5; // divide our vspd by 2, creating a smooth landing
}
if vspd > 8 // we don’t want to fall too fast, so lets limit our vspd
{
vspd = 8;
}
repeat(abs(vspd)) // we want to check for a collision every pixel, so we use a repeat() function to check every pixel while falling
{
if !place_meeting(x,y+sign(vspd),Block) // vspd can be negative or positive, so we check 1 pixel above or below, depending on which direction we are going
{
y += sign(vspd); // add to our y value 1 pixel at a time, letting use check for a collision every pixel
}
else // else if we hit a block
{
vspd = 0; // stop moving vertically
}
}
if keyboard_check(vk_right)== 1 //if We are pressing the Right Arrow Key
{
sprite_index = Player_Right
image_speed = 1
hspd=3;
dir = 1;
}
if keyboard_check_released(vk_right) // if we released the right button while walking right
{
hspd = 0;
dir = 1;
}
if keyboard_check(vk_left)== 1 //if We are pressing the Left Arrow Key
{
sprite_index = Player_Left
image_speed = 1
dir = 0;
hspd=-3;
}
if keyboard_check_released(vk_left) // if we released the left button while walking right
{
hspd=0;
dir = 0;
}
repeat(abs(hspd)) // same as the vspd, we want to check for a collision at every pixel we move
{
if !place_meeting(x+hspd,y,Block) // if there is no block to our left or right
{
x += hspd; // add to our x value depending on which way we are going
}
}
That finishes our “Player” character. New just Create a new object called “Block” and give it the 16×16 Block sprite we made earlier.
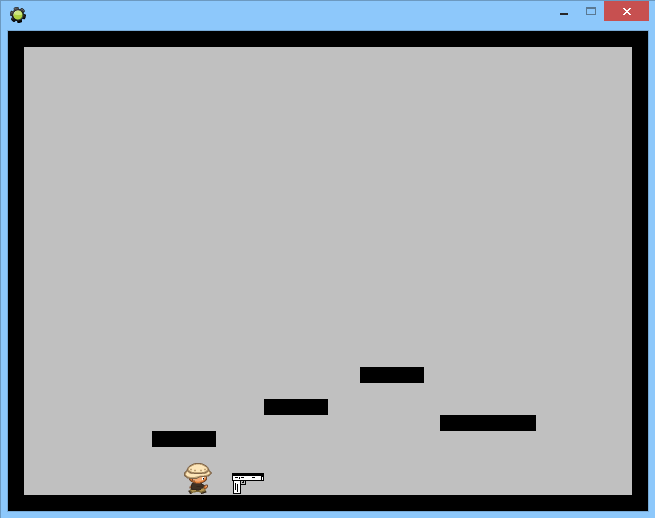
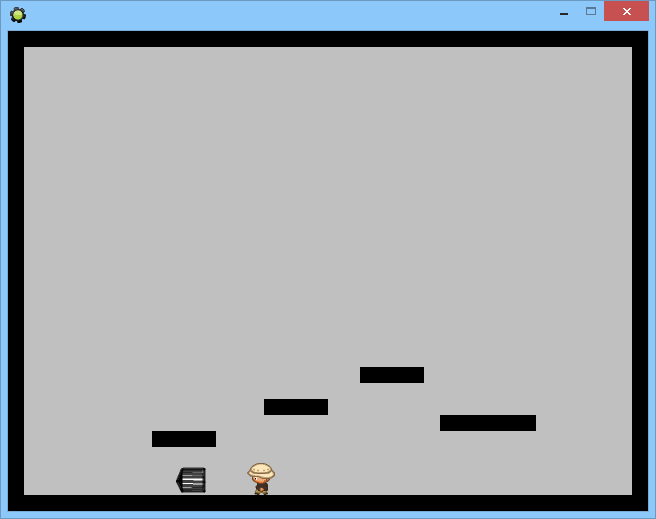
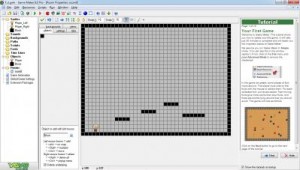
Now all we have to do is make our level. Click on “Create a room.” and place Block Objects wherever you want your player to be able to stand. I recommend placing them all around our level the making the platforms so that your player does not fall off the sides of the level. After you have done placing your Blocks, just place your Player object where you want him to spawn.
That’s it! You have created your first Platforming game. Just click on “Run the game.” to try out your game.
Post your doubts in the comments section below.
Note: The code for the Player movement is well commented but if you would like it to be explained in more detail I will be making another tutorial where I will be explaining the scripts used here in detail.
For Part II of this tutorial, refer [TUTORIAL] Making a Platform game with GameMaker Lite Part II